Perfect Steak? Here’s How to Age Meat Safely at Home
Meat aging used to be a job left to butchers and restaurants with controlled chambers and high-tech systems. But these days, more people are giving it a shot at home. With the right setup and some patience, aging meat in your own kitchen is not only possible, but it’s also a fun way to bring steakhouse-level flavor to your table.
Dry aging, in particular, draws fans for its rich flavor and tender bite, but it’s not as simple as throwing meat in the fridge and hoping for the best. There are tools and rules to follow if you’re going to do this right.
The main idea behind aging is giving natural enzymes in the meat time to work. As they break down connective tissue, the meat becomes more tender. At the same time, moisture slowly leaves the surface while concentrating the flavor.
This process has been used for decades to improve texture and taste, but if it’s not done carefully, it can go wrong fast. For home cooks, understanding how dry aging works is the key to doing it safely.
Dry Aging vs. Wet Aging
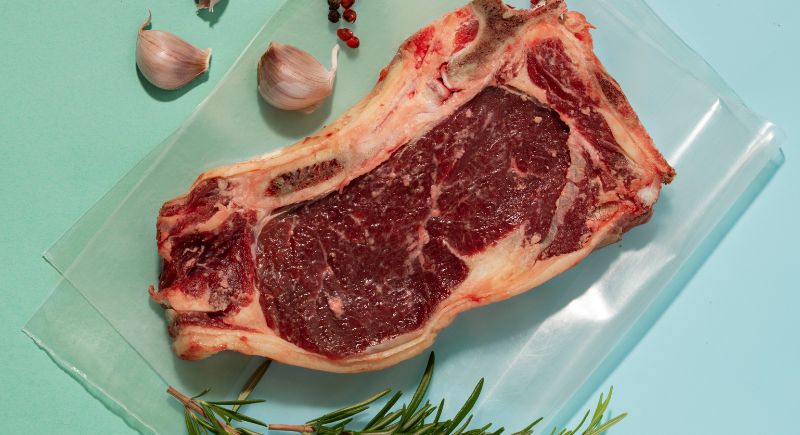
Image via FreePik
Before setting up your fridge, it’s worth knowing the difference between the two most common aging methods: dry and wet.
Dry aging involves placing unwrapped, whole muscle cuts in a temperature- and humidity-controlled environment. The meat develops a hard outer crust, which gets trimmed off before cooking. This method takes time, often 21 to 45 days. It also needs proper airflow to prevent mold and bacteria buildup. The reward is a deep, nutty flavor and firm texture.
Wet aging, on the other hand, is done by vacuum sealing the meat and letting it sit in its juices for about two to four weeks. This process is less risky and easier for beginners, but the flavor isn’t as bold. It’s a good option for people who want a bit of tenderness without all the equipment.
Choosing the Right Cut
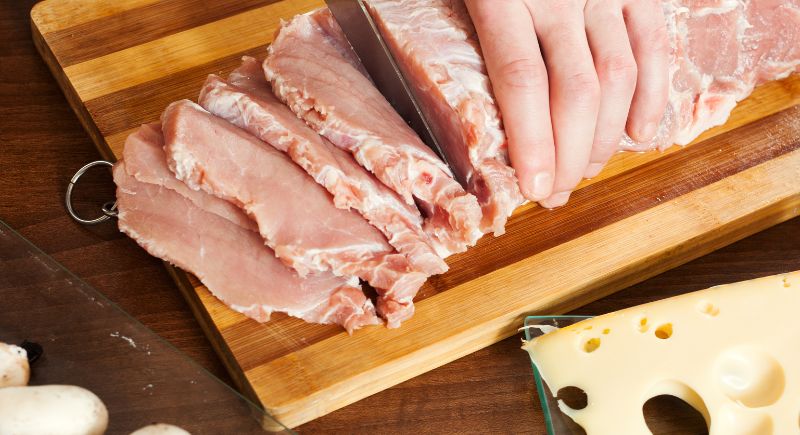
Image via FreePik/bearfotos
Not all cuts work well for aging. Individually cut steaks lose too much weight and aren’t worth the effort. Whole subprimals are the way to go. Ribeye and strip loin are two of the most popular cuts for aging at home. They have enough fat and size to withstand moisture loss and trimming without turning into scraps. Avoid lean cuts like round or brisket. They don’t carry enough marbling to gain much flavor during aging, and they shrink down too much.
Marbling refers to the tiny streaks of fat within the meat. It not only adds taste but also protects the meat as it dries. If you’re aging at home, start with a large, bone-in piece. Look for USDA Prime or high-end Choice grade beef. The bone gives you a buffer during trimming.
Setting Up Your Aging Fridge
Image via FreePik
Aging isn’t something you do in your regular fridge. You need a dedicated space, preferably a small fridge that holds a steady temperature and doesn’t get opened often. The constant airflow and lack of disturbance create a safer, more consistent environment. Avoid using the same fridge for sodas, birthday cake, or leftovers.
Wire racks are better than glass shelves because air can move freely around the meat. A small fan helps with circulation by keeping mold growth in check and ensuring that the meat dries evenly. Humidity should stay between 75 and 85 percent, and temperature needs to hold between 34°F and 38°F. Anything warmer invites bacteria, and colder temperatures can cause freezing, which stops the aging process.
Before adding any meat, clean the fridge with a bleach and water solution. A little prep upfront protects your investment. If you live in a very humid area, consider placing a block of salt inside the fridge. It helps draw out moisture and acts as a mild purifier.
How Long to Age the Meat
This depends on your taste and patience. Flavor changes start showing up around 21 days. By 30 to 45 days, you’ll notice the bold, savory profile dry aging is known for. Some people go longer, up to 60, 90, even 120 days. But the trade-off is more trimming and more loss. The outer crust thickens the longer it ages, and that means more of the final product ends up in the trash.
The sweet spot for most home aging sits around 30 to 45 days. At that point, the texture improves and the flavor gets deeper without being overwhelming. Aging for 14 to 21 days can also work, but it’s more subtle.
Also, not all mold is bad, so relax if you see this. A little white mold on the surface is normal and would still get trimmed off. If you see green, blue, or black spots, that’s when there’s a problem. That usually means the humidity was too high or air wasn’t circulating properly. Toss the meat if the smell is sour or off. A properly aged steak should have a strong aroma but not be rotten.
Keeping a consistent temperature and airflow is half the battle. Check the fridge daily. A simple thermometer and hygrometer can help you monitor conditions.
Prepping and Cooking the Aged Meat
Once aging is done, the next step is trimming. Use a sharp knife to cut away the thick, dark outer layer. Be generous. Leaving too much rind can ruin the taste and texture of the steak. If the meat underneath has a bit of brown color, that’s usually just oxidation. As long as it feels like normal raw meat and doesn’t smell bad, it’s fine to cook.
To season the steak, salt and pepper are all you need. The flavor is already concentrated, so fancy marinades or rubs are unnecessary. Let the steak sit out for 30 to 45 minutes before cooking to take the chill off. That helps it cook evenly.
For cooking, a hot pan or grill does the job. Sear both sides to create a crust, then finish in the oven if needed. Use a meat thermometer. Medium-rare lands around 130°F. Let the steak rest for at least 5 minutes before slicing. This helps the juices settle and keeps the meat tender.
Final Thoughts

Image via FreePik/xadartstudio
Dry aging at home takes planning, care, and a little bit of science, but the payoff is worth it. With the right cut, setup, and attention, you can create steakhouse-quality beef that tastes better than anything off the supermarket shelf. It’s not as complicated as one might think, and it turns dinner into something memorable. Keep the process clean, stay patient, and you’ll end up with a steak that’s flavorful, tender, and entirely your own.